Creating No Dig Beds
No dig gardening is good for your soil and removes a major physical barrier to gardening for many people. However, it does require heavy lifting to create the bed and so is not an option for everyone. Do read through this page and spend some time thinking before you take any action.
This is an approach to take if you either have a friend or family member who can help you with the heavy aspects of creating a bed or can afford to pay someone to do it for you. After that, a no dig bed needs significantly less weeding than traditional beds and can be more easily maintained by someone with limited energy and physical mobility.
This is an approach to take if you either have a friend or family member who can help you with the heavy aspects of creating a bed or can afford to pay someone to do it for you. After that, a no dig bed needs significantly less weeding than traditional beds and can be more easily maintained by someone with limited energy and physical mobility.
Use the links below to skip through the sections on this page
Think before you start
What is Best for your Health and Happiness?
One of the key considerations before you start is, how large a garden can you keep on top of in your current condition? A garden should be a joy and a source of healthy exercise rather than an emotional and physical burden. Don’t create new growing spaces unless you are certain they will make you happy and healthy. If in doubt, stick to what you have or grow in a planter or pot. You can always plan some beds on paper, ready for when you are in better health.
How much Energy / Time do I Need to Create No Dig Beds?
No dig beds are suitable for someone who is too tired or achy to dig but is still able to manage a regular half an hour or so of pottering in the garden.
To create the beds, you will need help from friends, family or a contractor to construct the new beds and carry heavy loads of compost. Your task is to do the essential planning beforehand and to brief and supervise the ‘labourers’ so that you get exactly what suits you – not someone else’s idea of what the bed should be!
Exactly how long construction will take depends on the type of bed you choose and how big it is.
Where Should I Place My Bed?
Spend some time looking at the space you have available and thinking about whether it is suitable for the plants you want to grow and will be easy for you to work in. Don’t just choose a space because it is free, or because you think it will look nice. A bit of planning saves a lot of disappointment and wasted energy later on.
Will my Bed be in Sunshine or Shade?
Choose an area of ground that receives plenty of sunshine if you can. Watch a potential space throughout the day to see where the shadows fall and if the sun reaches it directly at all.
A south or west-facing bed is ideal for lots of warm sun.
An area close to a north-facing wall will get very little sun and many plants, particularly edibles, will struggle to grow. If this is the only type space you have, do some research and plan for shade loving plants . Generally leafy greens are the best edibles for shade.
East-facing beds get the morning sun, but some plants don’t like being warmed up suddenly by direct sun on a frosty morning.
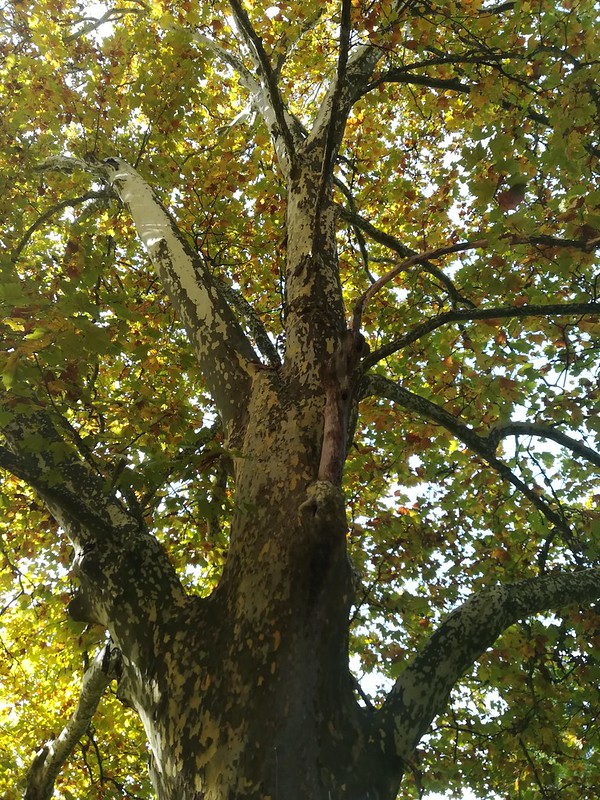
Don’t plant directly under an overhanging tree as the leaves will block out the sun. If your bed is under the edge – or drip-line – of a tree, your plants will get battered by the rain pouring off its leaves and your soil will get splashed around. Think what it’s like when you find yourself soaked by the run-off from someone else’s umbrella.
A south or west-facing bed is ideal for lots of warm sun.
An area close to a north-facing wall will get very little sun and many plants, particularly edibles, will struggle to grow. If this is the only type space you have, do some research and plan for shade loving plants . Generally leafy greens are the best edibles for shade.
East-facing beds get the morning sun, but some plants don’t like being warmed up suddenly by direct sun on a frosty morning.
Don’t plant directly under an overhanging tree as the leaves will block out the sun. If your bed is under the edge – or drip-line – of a tree, your plants will get battered by the rain pouring off its leaves and your soil will get splashed around. Think what it’s like when you find yourself soaked by the run-off from someone else’s umbrella.
Will my Bed be Sheltered from the Wind?

Windswept by John William Waterhouse 1903
Think about how much shelter your spot has. It may get lots of sun, but if your bed is in a wind tunnel, e.g. between two buildings facing into the UK's prevailing south-westerly winds, your plants will struggle to get established. Wait for a windy day and try standing in different areas of your garden to see what your plants will experience.
If your whole plot is exposed, think about planting some protective shrubs or a hedge as a wind break. Bear in mind the future work that this may create in keeping a hedge trimmed though. Leylandii may grow fast but they require a lot of trimming to keep under control. Some pretty shrubs that don’t grow enormously high and only need a little light pruning might suit you better.
If your whole plot is exposed, think about planting some protective shrubs or a hedge as a wind break. Bear in mind the future work that this may create in keeping a hedge trimmed though. Leylandii may grow fast but they require a lot of trimming to keep under control. Some pretty shrubs that don’t grow enormously high and only need a little light pruning might suit you better.
How Far will I have to Carry Water?
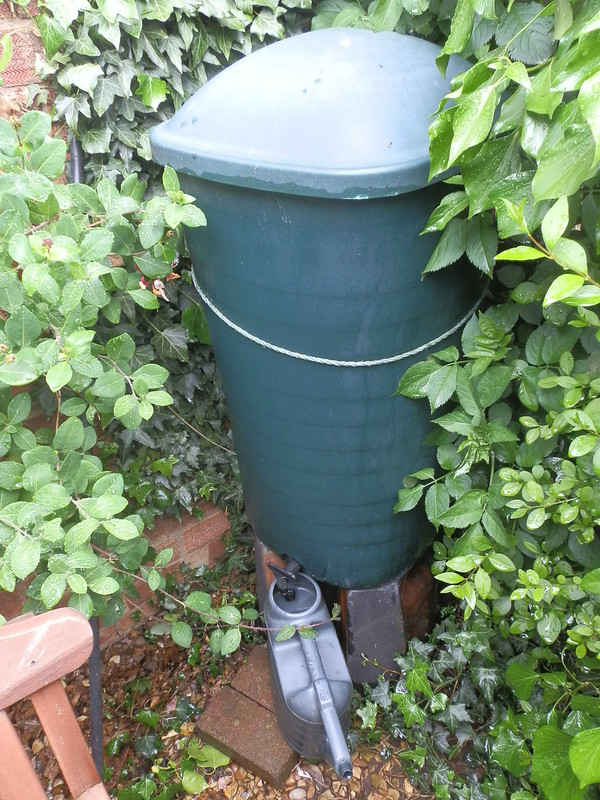
How close will your new bed be to a water source? The perfect-looking bed will quickly become a burden if you have to carry lots of water any more than a few steps to stop it drying out during a dry spell. Think about installing water butts on your down-pipes and on any sheds or greenhouses nearby. If all else fails, you can site a water butt near your new bed and fill it with a hosepipe, but environmentally it’s not ideal to use tap-water if you can save rain. Also, think about what you would do if there was a hosepipe ban.
What is the Ground Like?
It may sound too good to be true that digging is something that you should actively avoid but what if your garden is a riot of weeds and a huge dose of weed-killer and hours of heavy digging seem like the only viable way to get started? If this sounds familiar, please have a look at my Weeding page, towards the bottom, where I address this particular challenge.
What state is your soil in? You don’t need to prepare your ground by digging but it is helpful to know what depth of topsoil you have before you start. This will influence how deep your bed needs to be. See below for more on design and the depth of your beds.
What state is your soil in? You don’t need to prepare your ground by digging but it is helpful to know what depth of topsoil you have before you start. This will influence how deep your bed needs to be. See below for more on design and the depth of your beds.
What Type of Bed Should I Create?
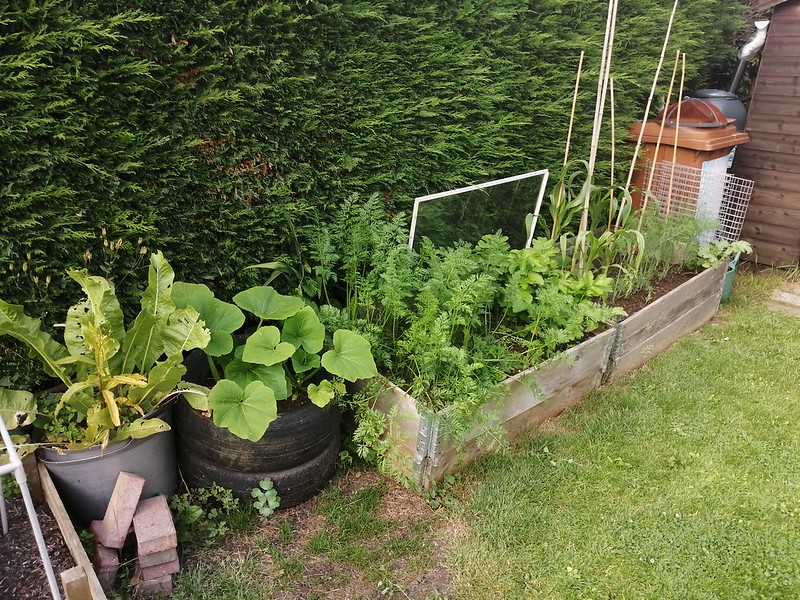
Planting spaces created from, left to right, pallet timber, plastic trugs, old tyres and pallet collars.
Consider Your Budget and Materials
The cheapest beds are those without edges, where you have a shallow trench dug around a central mound of soil. These are wonderful if you are on a tight budget but will only succeed if you have a good depth of soil to build your mound on. See below for advice on the depth of soil needed by plants. You also need to consider whether you are able to reach down to ground level or need some sort of container to raise the bed to a comfortable height.
You can go to the expense of buying heavy timber and paying someone to build you a raised bed or purchasing one of the many raised-bed kits that are on the market now. You can also buy large planters that are set at a height suitable for gardeners who can’t bend to reach their plants. If you are going to invest to this extent, do think about how durable the product is and what its predicted life-span is compared to its cost. It’s better to invest your money in good soil and compost than fancy containers that fall apart after a few years.
A quick and cheap alternative to using new timber or manufactured beds is to source either pallets, which can be broken up to provide boards (this is extra hard work), or some second-hand pallet collars. These are wooden frames with 4 metal hinged corners, which are used to hold the contents of pallets in place. The collars are constructed so that they stack on top of each other, with flanges to hold each one in place, making them ideal ready-made kits to stack as high as you need your bed to be. You can sometimes find pallet collars at builders’ yards or any business that brings in large volumes of palleted goods. They sometimes appear on E-Bay too.
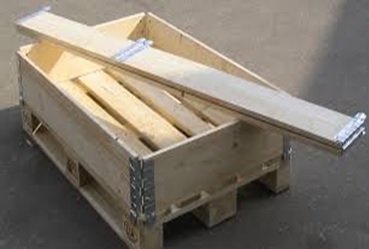
Folded and expanded pallet collars sitting on a pallet base.
How Big Should My Bed Be?
Make it Deep Enough for Your Plants
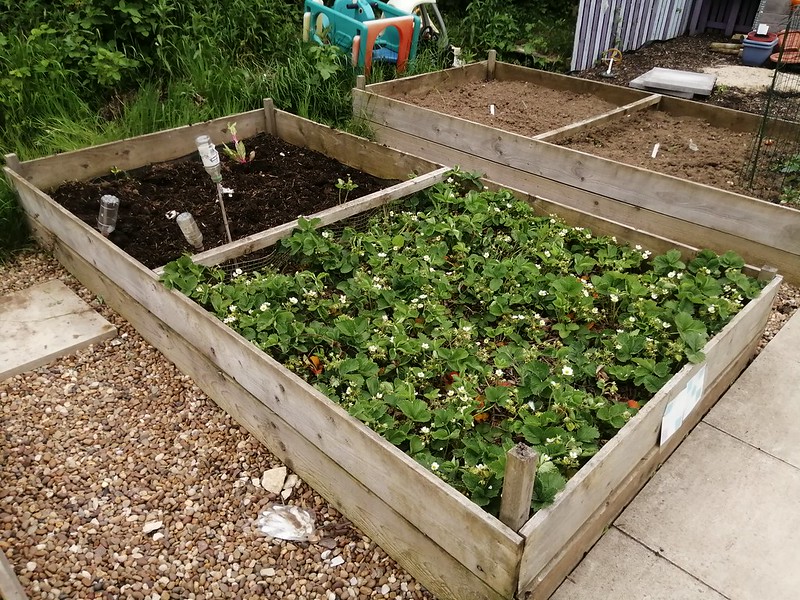
Salads growing in a shallow bed that began life as my daughter's sandpit. I made a simple square with four lengths of decking attached to corner posts. The initial fill was a bit too shallow so every year I add more.
Plants need a good 20 cm depth of soil to do well, so bear this in mind when deciding on your raised bed’s height. If the ground you are creating it on is good soil, you can get away with a shallower bed as the roots will go down through your new soil into whatever is below. If you have the classic new-build estate problem of a ‘garden’ which consists of a skim of turf laid over compacted rubble, your bed will need to be deeper.
Make it High Enough for You to Reach Comfortably

I saw this raised bed at a project for people with physical disabilities. The section on the right allows room for a wheelchair so the gardener can get up close without reaching or twisting.
Think about how mobile you are too. Is bending or reaching a problem? Do you need a higher bed to reach your plants comfortably? 60 cm is a good height for accessibility, but if you go any higher than this, don’t waste money filling the whole thing with soil and compost. Put in a layer of rubble to improve drainage and fill up space cheaply under your soil layer. Think about what tools you will use too, long handled to reach low down or short handled for better control in a higher bed? See my Weeding page for more advice on this.
Make it Narrow Enough for You to Reach to the Middle Comfortably
These beds were built on our community allotment before I arrived. they give lots of growing space but it's hard to reach the centre, particularly since the edging boards are narrow and not good for sitting on.
Don’t create beds that are so wide that you can’t reach the middle without standing on the soil as you will damage the soil structure. Climbing up on the bed to reach the middle may also be difficult and / or dangerous.
100 cm wide is good and you can get away with 150 cm if it’s in a spot where you can walk all around it. Leave plenty of room to manoeuvre around the bed too. Narrow paths make gardening awkward and trips and stumbles more likely. Can you turn easily? Can someone reach your bed with a barrow of compost?
If you have limited mobility and plan a high bed, especially if you will be sitting to garden, remember that this makes it even harder to reach the middle, so don’t be tempted to go wider than 100 cm.
What Shall I fill My New Bed With?

Beautiful, dark, crumbly home-made compost (not mine unfortunately).
Once you have chosen your location and the style of bed you want to create, think about what you are going to fill it with. It’s tempting to think that a bag of well-screened, good quality topsoil will be enough, but it really won’t. Even good quality topsoil is unlikely to have a high humus content as it will have been scraped up from some green space prior to a building project. At best it will have been fallow grassland or farmland subject to years of neglect as described on my Love Your Soil page. At worst, it may be full of stones, rubbish and weed seeds with very little humus at all. Buy or beg a substantial quantity of compost, manure or other organic matter and mix this in with your top-soil in layers as the bed is filled. The worms will combine it for you once they establish themselves.
How to Create Different Types of No Dig Bed
A No-frills Veg Bed

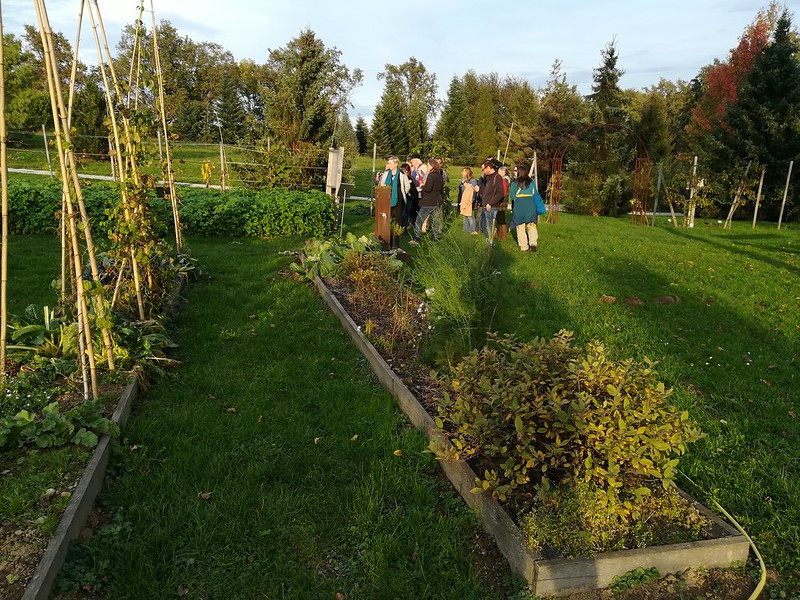
This allotment demonstrates the way a trench at the side of a bed acts as a barrier against invasive grasses from the bordering paths.
New growing areas can be created in a number of ways without digging. For a basic, no-frills veg bed, mark out the shape of the bed with tent pegs and string and get your friend or builder to do some minimal digging, creating a narrow trench along the line, extending just deep enough to get below the root layer of the surrounding grass. Creeping grass roots will make a bee-line for nice clear soil, but they don’t like growing into dry soil or air. A narrow trench provides a barrier to divert them away from your bed. You will need to keep this trench clear and rake any soil that falls/washes down into it every few months. It’s a whole lot easier than digging the roots out though!
These beds have timber borders which contain the soil and look neat but will need replacing every few years.
You can create tidy wooden edgings to a simple bed like this with boards, to slow the growth of weeds from the sides, but they do tend to rot after a few years.
Once the edge is done, lay down a thick layer of compost over the whole bed, at least 15 cm deep. If it is nice, fine compost you may be able to sow seeds directly into it. If not, start by planting out well-established plants from modules, rather than seed sowing, or make the top 4—5 cm layer topsoil to sow your seeds into.
There is no need to wait before starting to plant into your new bed. The depth of compost will block any light from reaching the weeds below, eventually killing them off. They will gradually be incorporated into your soil in the process described on my Love Your Soil page. See my Weeding page for more on this approach to dealing with weeds. Some stronger weeds may make it through to the light but will be considerably weakened; regularly cutting off their tops will eventually finish them off.
Add a new mulch of compost every year and your soil will get better and better. Rather than buying large amounts of expensive compost every year, see if you can source some free or cheap supplies from a local farm or horse owner.
A Pallet Collar Bed
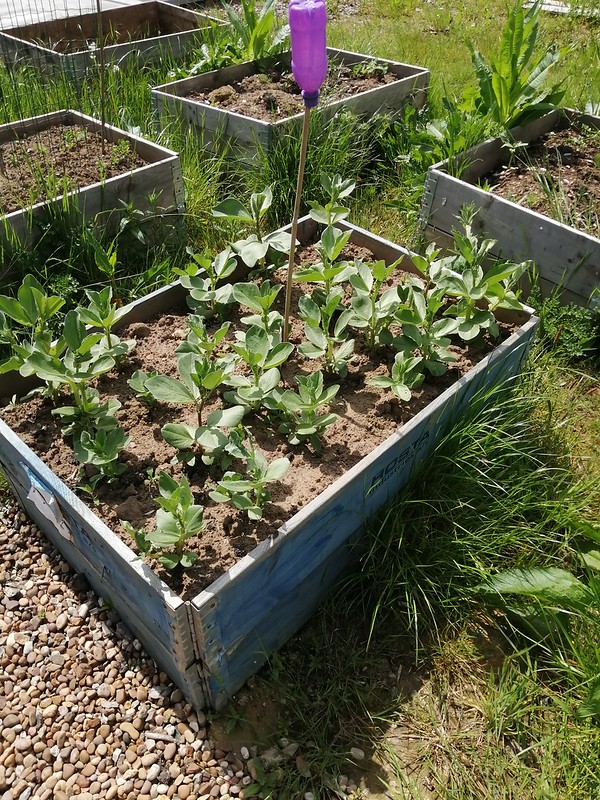
These are newer beds on the community allotment made out of two stacked pallet collars. You can see the hinges at the front corner. Not pretty but free, quick and easy! The plastic bottle is there to prevent people from poking their eyes on the cane. Why the cane is there is not clear.
For a pallet collar bed you will need:
If you like, you can paint your collars before constructing the bed to make them look nicer.
If you need to cover your crops with mesh, fleece or netting you can make cheap supports with lengths of plumbers’ pipe bent over and pushed into the corners. A few tacks pushed into the outer rim of the bed will give you something to hook netting over to keep it tight.
- 2 or 3 pallet collars
- Large sheets of cardboard big enough to cover the base of the bed (shops that put large boxes out for recycling are useful here)
- Topsoil and compost to fill
If you like, you can paint your collars before constructing the bed to make them look nicer.
- Choose your site and cut any bulky vegetation to ground level. Don’t worry about grass, you can work on top of it.
- Lay the cardboard on the ground where the bed will be. If you need to overlap pieces, do so by 10 cm or so for a good cover. The fibrous cardboard will create a further barrier to any weeds trying to reach the light but will rot into the soil over time. Plant roots heading downwards are far better at piercing wet cardboard than soft shoots heading upwards.
- Place the first pallet collar on the ground on top of the cardboard with the flanges facing downwards. Check the sides are square relative to each other and press the flanges into the soil.
- Drop as many collars on top as you need for the depth required and make sure they sit well with the flanges holding them in place.
- Test your new bed to make sure it is definitely in the right place and you can reach all parts of it easily.
- Fill the new bed with a mixture of topsoil and compost or manure to the top.
- Plant it up with whatever you fancy growing.
If you need to cover your crops with mesh, fleece or netting you can make cheap supports with lengths of plumbers’ pipe bent over and pushed into the corners. A few tacks pushed into the outer rim of the bed will give you something to hook netting over to keep it tight.
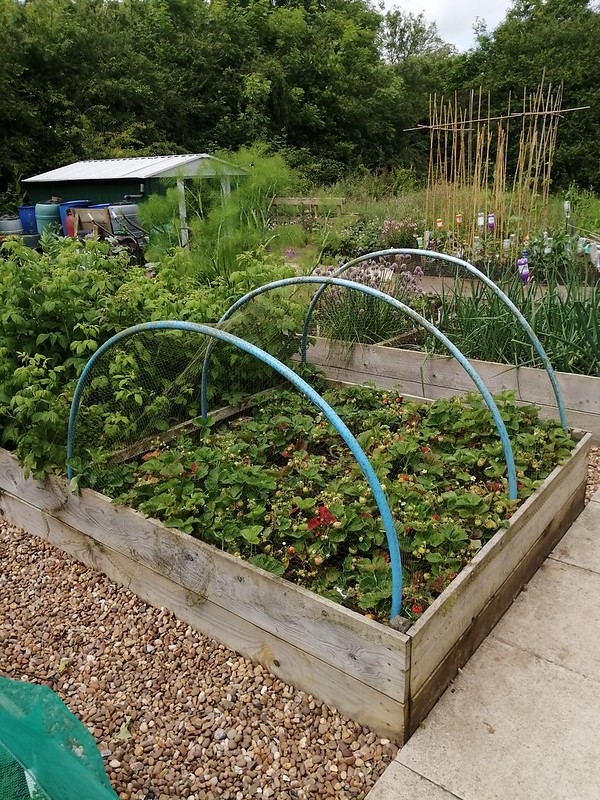
Hoops of plumbers' pipe pushed into the corners support netting to keep birds off our strawberries. the netting is hooked over roofing felt tacks at intervals all around the edge of the bed.
A Lasagne Bed

The raised area on the right is a hugelkutur bed in a permaculture display garden. This is a variety of lasagna bed with the addition of a layer of woody material at the bottom.
If you have a lot of dead plant material to hand, for example, if you have just strimmed an area of weeds to turn into a growing area, make use of this composting resource as part of your new bed and have a go at making a lasagne bed. The lasagne refers to the layers of Green and Brown materials that make up the bed – see below for examples. These are laid down over a base layer of cardboard or newspaper to a depth of about 60 cm and finished off with a layer of topsoil into which you can plant straight away. The layers below will gradually compost down, providing warmth and nutrients as they do so. As with other methods of no dig gardening, you add a new layer of compost each year, or a layer of compostable material in autumn, which will break down and be incorporated by the spring.
There are excellent instructions for building a lasagne bed online here, so I won’t repeat them here. Just make sure you plan ahead and get someone fit and healthy to do the heavy work of setting it up; a 60 cm depth of materials is a large amount to shift. You will also need somewhere to store your materials as you save up enough to construct the bed, so take this into account when deciding if this method is for you.
Incorporating larger woody material like this is typical of a bed system called Hugelkultur, an aspect of Permaculture gardening. This is really beyond the scope of this site but if you are interested follow the links.
Balancing Layers in a Lasagna Bed
All good compost needs to be created from a mix of approximately 50:50 Brown and Green materials. The Greens provide necessary moisture and are rich in the nitrogenous materials needed by the bacteria and fungi that decompose your heap as well as by your plants. The Browns are high in carbon and are slow to decompose, soaking up any excess moisture and providing essential air pockets for bacteria and fungi.
Too many greens and you will have a soggy, smelly, airless mess swarming with fruit flies.
Too many browns and you’ll have a dry heap that just doesn’t decompose.
For a lasagna bed build alternate layers of Greens and Browns and finish off with a layer of topsoil.
Too many greens and you will have a soggy, smelly, airless mess swarming with fruit flies.
Too many browns and you’ll have a dry heap that just doesn’t decompose.
For a lasagna bed build alternate layers of Greens and Browns and finish off with a layer of topsoil.
Greens: fresh moist plant materials
Examples:
Grass mowings
Living weeds (take off any seed heads and thick roots)
Vegetable peelings
Tea leaves and coffee grounds (not all Greens are green!)
NEVER INCLUDE COOKED FOOD SCRAPS AS THESE ATTRACT RATS
Grass mowings
Living weeds (take off any seed heads and thick roots)
Vegetable peelings
Tea leaves and coffee grounds (not all Greens are green!)
NEVER INCLUDE COOKED FOOD SCRAPS AS THESE ATTRACT RATS
Browns: dry woody plant materials
Examples:
Straw
Woodshavings from pet bedding (plant eaters only)
Woodchips
Bark chippings
Cardboard
Scrunched up paper
Dead, twiggy plants
Straw
Woodshavings from pet bedding (plant eaters only)
Woodchips
Bark chippings
Cardboard
Scrunched up paper
Dead, twiggy plants
If you have any small branches or twigs, these need to go right at the bottom as they will take a long time to decompose. Keep these to a thin layer if you include them at all.
The lasagne refers to the layers of compostable material that create your bed rather than the plants you choose to grow in it, although a themed bed in which you grow the plants for a specific meal can be fun. This take on a lasagne bed could include tomatoes, marjoram and courgettes, or how about a soup bed with leeks and potatoes?
My illness has meant that I have had to give up my work and so I am now looking to find a new career through my writing. If you have enjoyed this page and would like to encourage me to produce more, click the coffee cup below to make a small donation; no strings, no fuss, just a little, 'Thanks, keep it up.'
You can also help by sharing this page on your social media.