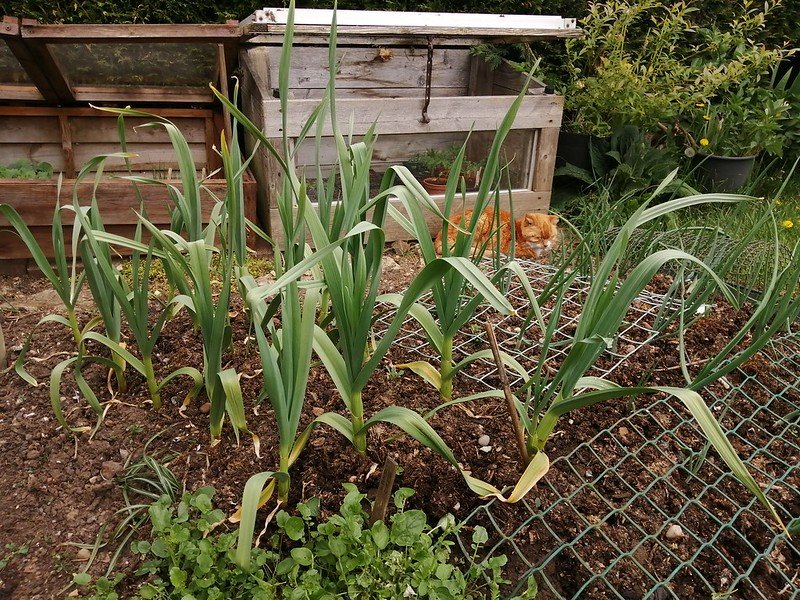
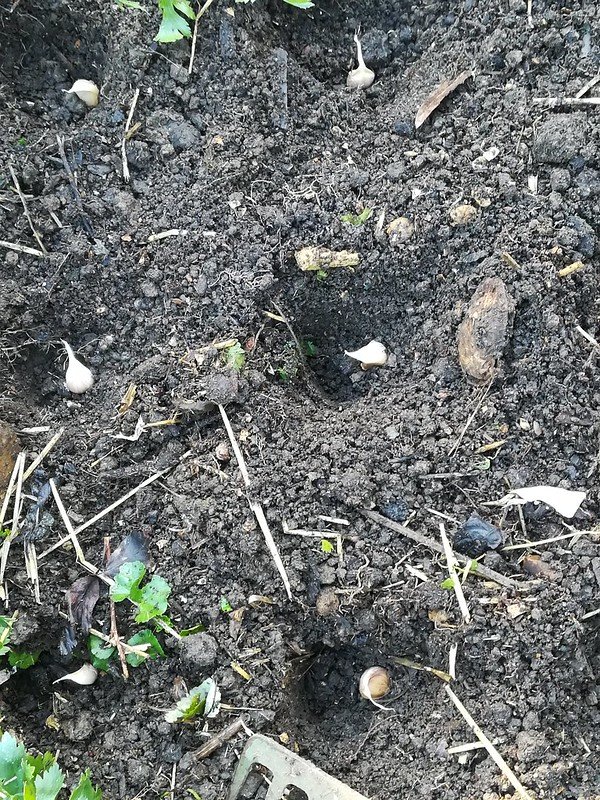
It is, surprisingly, one of the easiest crops for a beginner to grow outside. The pungent scent of garlic elicits thoughts of rich Mediterranean food or spicy curries; the food of sunny climates. It’s easy to assume that such a crop needs far more sunlight and warmth than is possible in the UK without a heated greenhouse. In fact, garlic needs cold weather to thrive and is usually planted outdoors in October/November in order to benefit from as long a period of winter cold as possible.
Grow Your Own Garlic
Garlic is delicious, has many healing properties and is incredibly easy to grow.
Time Taken / Energy Needed
Half an hour, starting with a clear patch of ground. Plan as two sessions if you need to weed your patch first.
To avoid heavy weeding, garlic can also be grown in a large container full of compost, but will need feeding weekly, once it starts growing, and watering to keep the compost damp (not wet!).
Weeding is something to try if you are able to manage a 20-30 minute walk and can get down on your knees. The hardest parts are clearing the weeds and raking the soil. A long handled hoe and rake mean you have less bending. Long handled trowels are also available, but all of these can feel heavy and unwieldy to handle with weak arms.
Alternatively, get down on your knees, using a kneeler and use the side of a trowel / daisy grubber to slice horizontally just under the surface, which pulls out/chops off annuals. Do a little bit at a time when you can and listen to your body.
If this still feels like too much, delegate the ground preparation and stick to doing the planting part yourself.
Equipment
• 1 or 2 bulbs of garlic. Use bulbs raised for growing rather than eating as they are more reliable. Garlic bulbs can be bought in the autumn in most garden centres and some shops with gardening sections. You can also buy them online, although postage costs make this an expensive option for small quantities. For information on whether to choose hardneck or softneck varieties click here: What's the difference between hard and soft neck garlic?
• A trowel
• A label to show what you have planted and where.
• An area of soil in a well-drained, sunny spot, around 1m by 1m, raked to break up any big lumps and clear of weeds, OR a large container (30+cm diameter) full of compost.
• A bag of compost, or home-made compost, to mulch your garlic and reduce the weeding (optional, see below re. mulching).
• A piece of rigid netting/fleece with pegs, big enough to cover the planting area, or lots of small, branching twigs to protect your crop (see below).
Instructions
• Break your garlic bulb into separate cloves, making sure to keep the papery layer around each one intact. There will be around 8 nice fat cloves around the outside and a cluster of much smaller ones in the centre. You can plant them all, but the fat ones have more energy stored, so will grow more strongly.
• Look at a clove and you will see that one end has a slightly flattened, hard surface. This is where the roots will grow from. The other end it is more pointed and this is where the leaf shoots will emerge.
• Discard any cloves that are mouldy, dried out or very small
• Count how many cloves you are going to plant.
• Dig a series of holes, one for each clove, 15cm apart in a grid and about 2cm deep.
• Place a clove in each hole with the pointed end up and draw the soil back into the holes.
• Mulch the area, i.e. cover it in compost in a layer 2-3 cm deep. This will prevent light from reaching the weed seeds and so stop most of them from germinating. This means there you have to spend far less energy on weeding. If you don't mulch, plant the cloves a little deeper. The tips need to be about 2 ½ cm under the surface.
• Label your crop so you remember where and what it is.
There’s no need to water your garlic at this point. The winter rains will take care of that.
Pests and Diseases
Cats and blackbirds. Cats will use any clear patch of soil as a toilet, destroying your crop and fouling the soil.
Blackbirds also love newly turned ground and will scratch through it looking for worms/grubs, pulling out your cloves in the process.
Cover the area of newly planted ground with rigid netting or fleece and peg it down securely. Floppy netting creates the danger of hedgehogs and birds tangling their feet in the net. Rigid net lets them reach any slugs etc without doing damage or getting caught.
Alternatively, you can stick lots of small, branching twigs in so that it’s difficult for cats or birds to find space to scratch. You can remove all this protection once the new plants have emerged and are a few centimetres tall.
Rust Garlic can often develop orange rust spots. Small amounts don’t cause any problems, but if you spot any badly infected plants, or ones that look stunted or diseased, pull them out to prevent any problems spreading. Dispose of the plant in your garden/food waste bin. Don’t add diseased plants to your home compost bin, which is never hot enough to kill fungal spores.
For more information on organic management of garlic diseases click here:
organic management of garlic diseases
Watering and Feeding
The plants may need some watering in the spring, but only if the weather is very dry. Never water after May as very wet soil can rot the bulbs as they swell.
The basic organic principle is to feed your soil, not your plants. The compost mulch will be drawn down to the soil by worms over several months, taking the nutrients with it. If you are using a container, feed with a liquid feed weekly, once the green shoots appear.
Harvesting
Your crop will be ready to harvest around July, once the leaves have started to turn yellow. This means they are no longer growing and putting energy into the garlic bulbs.
• Use a fork to dig alongside each plant, keeping the tines upright as they push in and making sure you don’t spear the bulb. Gently lever the fork up and the plant will come with it.
• Shake the soil from the roots and lay the plants in a sunny, dry spot for a week or so, until the leaves are completely dry and crispy.
• Either:
cut off the leaves and trim the roots to store individual bulbs in a net or cotton bag
or,
if you have a softneck variety, have a go at plaiting the leaves together and storing your plaited garlic by hanging it somewhere dry and airy.
A quick and simple idea for using your garlic harvest:
Soften a pat of butter by leaving it at room temperature for an hour. Crush the garlic with a garlic crusher or squash with the flat of a knife blade then chop finely. Mix the garlic into the butter. Chill until firm, form it into a sausage shape and wrap in greaseproof paper before freezing inside a plastic bag. You can take it out of the freezer and chop off as much as you need, when you need it.
You can add finely chopped herbs with the garlic too, e.g. parsley, cilantro, basil or dill.
Eat with a jacket potato or melted over vegetables/fish.
Categories: outdoorsautumnwinter30-45 minsmedium energylow energycontainers
My illness has meant that I have had to give up my work and so I am now looking to find a new career through my writing. If you have enjoyed this page and would like to encourage me to produce more, click the coffee cup below to make a small donation; no strings, no fuss, just a little, 'Thanks, keep it up.'
You can also help by sharing this page on your social media.
If you enjoyed this activity, explore my others through my Activities home page.